
The best floor laser level for tile or plank work is usually a green tool that puts a level horizontal reference near the slab—not a rotary grade laser meant for yard elevation. Flooring layout demands square rooms, consistent starter rows, and a line you can see on plywood, backer, and finished surfaces without crouching every six feet.
We compared ten products in order for the best laser level for flooring installation: budget cross-lines with tripods, 4×360° and 4D planes with bottom lasers, a right-angle square helper, and honest red options. None of these replace a rotary for outdoor grading—they solve indoor floor plane and square layout.
Top 3 Picks for Best Floor Laser Level
DOVOH K4-360G 4D

- Bottom horizontal plane sits close to the slab for tile and flooring starts
- Four-plane 4D coverage squares rooms without constant repositioning
- Dual batteries and rubber overmold suit long install days
CinusLinus 4×360 Kit

- 4×360° green lines wrap floor, walls, and ceiling in one setup
- Tripod kit targets renovation and floor tile layout
- Strong value when you need complete room visualization
Motovera Green Cross + Tripod

- Tripod and bright green cross included for first-time floor installers
- Pulse mode and brightness steps for varied room lighting
- Honest cross-line—not a rotary grade tool
Affiliate Disclosure: As an Amazon Associate we earn from qualifying purchases. We earn a commission, at no additional cost to you.
10 Best Floor Laser Levels Compared
Compare floor layout tools by plane coverage, proximity to the slab, tripod inclusion, and visibility. Stated ranges are indoor unless pulse mode with a receiver is noted.
- 100 ft green cross-line
- ±1/9 in @ 33 ft; pulse
- Tripod + 4 brightness modes
- 4×360° green planes
- Tripod; floor tile focus
- Bottom plane near slab
- 90° green line pair
- 30 ft; suction + magnetic base
- Dual bubble vials
- 4D floor/wall/ceiling planes
- ±1/10 in @ 8 ft
- Remote + dual batteries
- 100 ft; low wall/floor offset
- 3 brightness + pulse
- Tripod bundle
- 50 ft cross-line
- ±5/16 in @ 30 ft
- IP55; magnetic mount
- 100 ft cross-line
- Pulse to 164 ft w/ receiver
- Rechargeable pocket size
- 12 lines; 3×360° planes
- Remote; 4000 mAh recharge
- IP54 construction
- Dual H + dual V planes
- Bottom laser for floor tile
- Dual rechargeable batteries
- Red H/V cross-line
- ±1/8 in @ 30 ft
- IP54; magnetic mount
We earn a commission, at no additional cost to you.
Detailed Product Reviews
1. Motovera Green Cross + Tripod
Motovera is a practical best floor laser level starter when you are laying out the first rows of laminate or checking datum around a room without buying a four-plane pro tool. The green cross-line stays readable on plywood and backer board, and the bundled tripod sets a stable height above the slab.
- 100 ft green cross-line
- ±1/9 in @ 33 ft
- Tripod 15 in+ extension
- Pulse + manual modes
- IP54 housing
- Complete tripod kit for floor layout
- Green visible on tile backer
- Four brightness modes
- Pulse for optional receiver
- Low cost entry to flooring layout
- Single cross—not full floor plane
- Light-duty tripod
- Not a 4D bottom-laser specialist
As the best laser level for flooring installation on a budget, Motovera trades full-room 360° floor coverage for simplicity. You will reposition more often than with DOVOH K4-360G or CinusLinus 4×360, yet many DIY floor projects stay acceptable when pulse mode and brightness steps keep the line visible in mixed lighting.
Place the tripod on the subfloor, unlock self-leveling within ±4°, and mark the horizontal intersection for your starter row. Use manual mode only for intentional slopes. Flashing lines mean out-of-level—adjust legs before snapping chalk.
Upgrade to 4D tools when the bottom laser must hug the slab continuously. Keep Motovera when a bright cross and tripod cover your square footage at lower cost.
On Motovera floor days, set tripod height once for the starter row and resist raising it mid-run when a doorway reveal tempts you—consistent beam height keeps plank math sane.
Budget floor truth
A cross-line plus tripod helps floor layout; it is not the same as a dedicated bottom 360° plane.
Subfloor height math
Account for underlayment and wear-layer thickness before trusting a slab-height laser tick; a line that ignores build-up creates a proud first row.
We earn a commission, at no additional cost to you.
2. CinusLinus 4×360 Kit
The CinusLinus 4×360 kit—filled from listing data when Amazon omits title details—targets buyers who want the best floor laser level coverage without guessing accessories. Four 360° green planes wrap walls, ceiling, and critically the floor plane for tile and flooring installation layout.
- 4×360° green lines
- Tripod + floor tile focus
- Self-level ±4°
- Renovation/construction kit
- CinusLinus 4D branding
- Full floor plane coverage
- Tripod included in kit
- Bottom line near slab for tile
- 360° visualization for square rooms
- Strong listing for renovation
- Busy beam pattern for small rooms
- Verify calibration on arrival
- Less brand heritage than Bosch/Klein
For best laser level for leveling floors workflows, a low bottom horizontal line beats crouching with a single cross repeatedly. Pair the tripod with stable leg placement on subfloor or cured slab, allow self-leveling, and walk the room perimeter checking square before mixing thinset or locking the first plank row.
Enable only the planes you need; sixteen visible lines overwhelm small bathrooms. Remote and battery extras vary by shipment—confirm the box on delivery. Field-check square at two diagonals before trusting long runs.
Choose CinusLinus when full-room green planes and tripod completeness matter. Choose DOVOH K4-360G when rubber overmold, dual batteries, and a proven 4D story fit pro tile crews.
CinusLinus rewards walking the perimeter with only the floor plane enabled before thinset; sixteen busy lines make helpers mark the wrong elevation in tight baths.
Why 4×360 for floors
A continuous floor plane reduces repositioning when you square large tile fields or floating floor layouts.
Open-concept repositioning
On long LVP runs, prefer a 360° floor plane so you are not chasing a single cross every eight feet while thinset or click-lock timing pressures the crew.
We earn a commission, at no additional cost to you.
3. Right-Angle Floor Square Laser

This right-angle floor square laser solves a different best floor laser level problem: establishing perpendicular reference lines at a corner without setting a full cross-line tripod. For ceramic tile, wood flooring, and wallpaper starts, two 90° green lines plus bubble vials accelerate square checks on short runs.
- Two 90° green lines
- 30 ft visibility
- 5° protractor increments
- Dual bubble vials
- Suction + magnetic base
- Purpose-built 90° square for tile
- Hands-free suction mounting
- Quick corner square checks
- Compact for bathroom floors
- Simple one-touch operation
- 30 ft range limits big slabs
- Not a full-room level plane
- Class 3R—normal laser caution
As a best laser level for flooring installation helper—not a replacement for a 360° plane—it shines in bathrooms, closets, and L-shaped rooms where suction cups stick to smooth tile or glass and the protractor handles non-standard corners within stated tolerance.
Press cups on clean surfaces, level with dual-axis bubbles, and project the square before dry-fitting the first row. It will not span an entire open concept alone; pair it with a cross-line or 4D laser for long straight runs.
Buy the square laser for corner discipline. Buy Motovera or DOVOH when continuous horizontal reference across the whole slab defines the job.
The right-angle square laser belongs at the first corner dry-fit, not as a substitute for a continuous horizontal plane across the open field.
Square vs level
Right-angle projection complements—but does not replace—a level horizontal plane for long floor runs.
Corner square before level
Establish 90° at the doorway with diagonals or a square laser, then lock the horizontal floor reference—level lines on a parallelogram room still look wrong at the threshold.
We earn a commission, at no additional cost to you.
4. 16-Line 4×360 Green Laser

The 16-line 4×360 green laser is a prosumer best floor laser level when you want every plane visible before locking a large format tile layout or floating floor pattern. Two horizontal and two vertical 360° lines square the room visually while the bottom plane tracks near the slab.
- 16 lines; 4×360° 4D
- ±1/10 in @ 8 ft
- 100 ft range; 1–100% brightness
- Remote + 2×2400 mAh batteries
- Magnetic bracket + mini tripod
- Complete floor/wall/ceiling wrap
- Remote line selection
- Dual batteries for long pours
- High visibility green diode
- Strong for large tile fields
- Complex for first-time users
- Outdoor claims still need realism
- Many lines can clutter small spaces
For best laser level for flooring installation at scale, remote line control matters—you can dim unused beams and focus on the floor reference while crew members mark offsets. ±1/10 inch at eight feet suits tile starts; verify with a manual check on diagonals before committing adhesive.
Charge both batteries for long sessions. Use manual/outdoor lock modes only when the slope is intentional. IP54 and adjustable brightness help dusty remodel environments but do not replace eye-safe habits.
Choose this 4D unit when remote control and dual batteries beat simplicity. Choose Motovera when a single cross and tripod are enough for a one-room DIY install.
With the 16-line 4D unit, remote-disable ceiling planes while flooring so nobody nails a wall reveal thinking it was the slab reference.
Large floor fields
Remote line selection keeps big tile jobs organized when sixteen beams would otherwise distract.
Remote line hygiene
Disable unused 4D beams in bathrooms so helpers do not mark a vertical wall plane thinking it was the floor reference.
We earn a commission, at no additional cost to you.
5. DEGLASERS Green Cross + Tripod

DEGLASERS earns a best floor laser level nod for a practical detail: the housing places the cross close to the ground and wall—about 13 mm and 7 mm offsets per listing—so you see the intersection where tile meets baseboard without stacking shims under the body.
- 100 ft green cross
- ±1/9 in @ 33 ft
- Low offset near floor/wall
- 3 brightness + pulse
- Tripod included
- Line sits close to slab and wall
- Tripod bundle ready
- Osram green diode brightness
- Pulse for brighter conditions
- Good remodel value
- Single cross—not 360° floor plane
- Tripod height limits vs 50-in peers
- Generic brand support
As a best laser level for flooring on a budget, the tripod kit plus three brightness steps covers hanging pictures one week and dry-fitting plank the next. Pulse mode activates through brightness controls; read the manual once so you do not confuse pulse flashing with out-of-level warnings.
Self-level within 3.5°; reposition when flashing persists. Lock pendulum for angled stair work only. Wipe the lens before floor work—thinset dust scatters green light.
Pair DEGLASERS with a square laser for corners if you need 90° confirmation. Upgrade to 4D when you want a continuous floor plane without moving the tool.
DEGLASERS’ low offset helps when you kneel to mark porcelain—wipe the window after every cut, because dust fattens the near-slab line.
Low offset advantage
Near-slab projection reduces parallax error when marking tile lippage-sensitive runs.
Low-offset payoff
Tools that sit the beam near the slab reduce parallax when you kneel to mark thin porcelain—re-check after any shim under the housing.
We earn a commission, at no additional cost to you.
6. Bosch GLL50-20 Red Cross
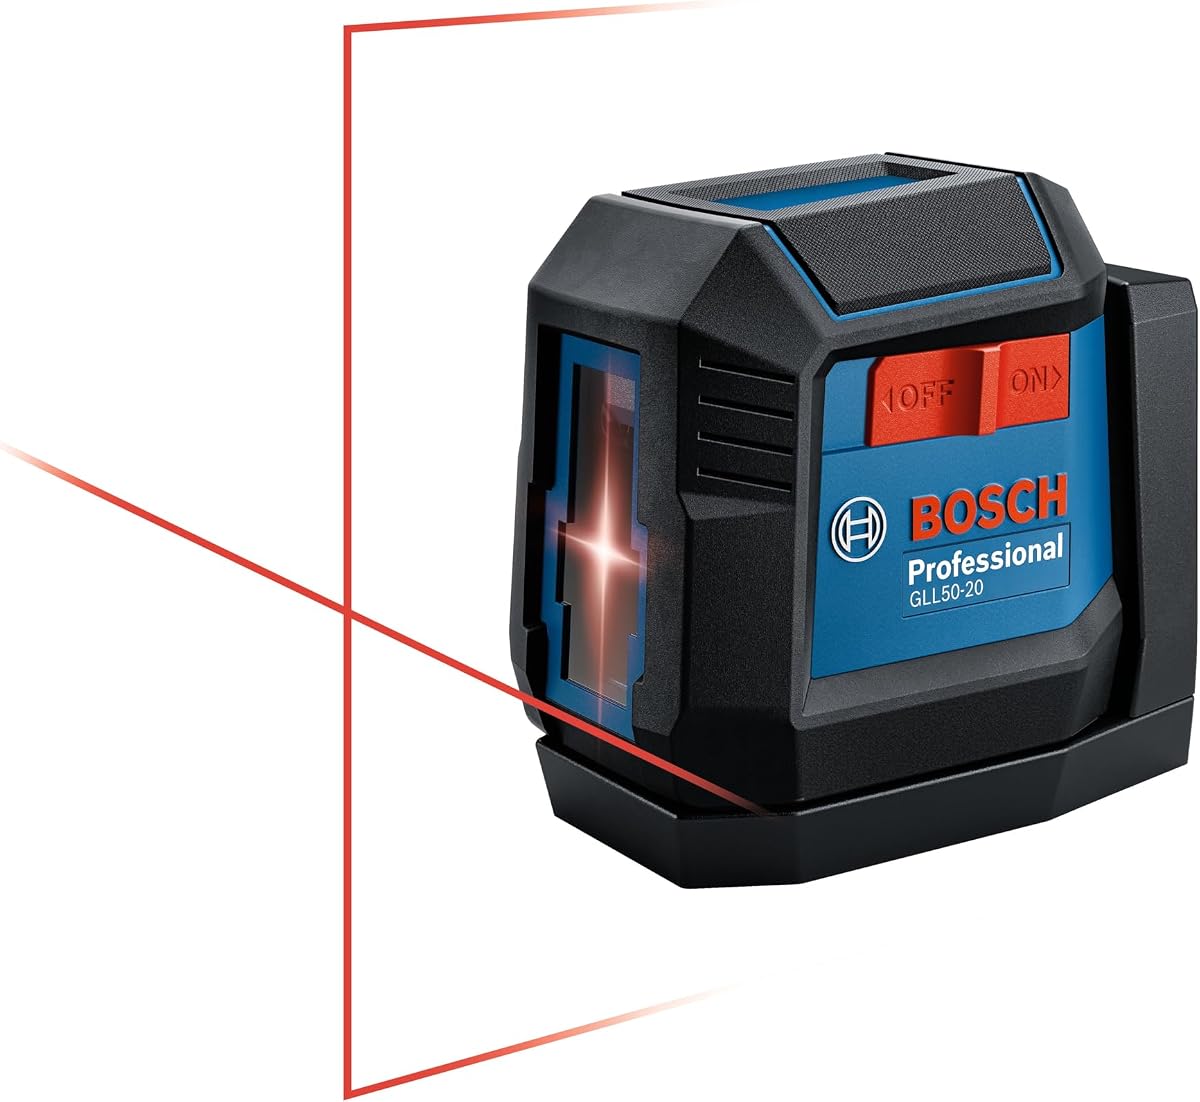
Bosch GLL50-20 is the conservative best floor laser level pick for installers who trust red lines indoors and want IP55 durability without feature overload. It will not wrap a room in 360° planes, yet for verifying a level datum across a subfloor or snapping control lines on backer, it remains dependable.
- 50 ft red cross-line
- ±5/16 in @ 30 ft
- IP55 sealing
- Magnetic mount
- AA or optional Li-ion
- Bosch reliability and ergonomics
- Thin red lines for indoor layout
- Smart pendulum out-of-level blink
- Compact storage
- Proven battery flexibility
- Red dimmer than green on floors
- 50 ft range shorter than peers
- No 360° floor plane
The best laser level for flooring installation is not always the brightest green listing. Bosch’s ±5/16 inch at 30 feet and familiar magnetic mount fit contractors who already stock AA cells and prefer a slim tool pouch between rooms on multi-floor builds.
Blinking equals out-of-level—reposition on the slab or a short tripod. Optional Bosch Li-ion packs reduce swaps on long days. Keep red beams off direct sun; this is an indoor floor companion.
Choose GLL50-20 for brand trust and simplicity. Choose green 4D tools when visibility on pale tile or wide open slabs demands brighter beams.
Bosch red crosses still earn indoor subfloor checks; just accept you will reposition more often than with a green floor plane on pale LVP.
When red is enough
Indoor subfloor and backer layout often favors trusted ergonomics over maximum beam color marketing.
Red-beam indoor floors
Dark OSB can accept red crosses; pale maple LVP usually wants green. Change diode color when the substrate color changes mid-project.
We earn a commission, at no additional cost to you.
7. Fanttik D2 Pocket Green

Fanttik D2 is the pocket best floor laser level for installers who hop between rooms setting starter rows and do not want a full tripod kit every time. The green cross is bright enough for many flooring tasks, and the magnetic bracket clamps to door tracks or shelf standards for quick horizontal checks.
- 100 ft green cross
- ±1/8 in @ 30 ft
- 2200 mAh USB-C recharge
- Pulse to 164 ft w/ receiver
- 0.56 lb pocket size
- Ultra portable between rooms
- Ten-hour runtime claim
- Magnetic bracket rotation
- Pulse for optional outdoor receiver
- Drop-resistant TPE body
- No tripod in box
- Single cross—not floor plane
- Receiver sold separately for pulse range
As a best laser level for leveling floors in tight remodels, D2’s rechargeable cell and 360° bracket rotation help under cabinets and in closets where a 4D tower will not fit. Pulse mode extends range only with a separate receiver—plan accordingly for bright sunrooms.
Unlock pendulum for level lines; lock for manual angles on stairs. At 0.56 lb, treat it as a secondary reference you carry while a larger 4D laser owns the main field layout.
Buy D2 for portability. Pair with CinusLinus or DOVOH when the primary job is a full-room floor plane on open slabs.
Fanttik D2 is the runner that confirms a transferred mark in a closet while the main 4D laser stays planted in the great room.
Pocket floor helper
Use D2 for quick checks; let 4D lasers own the main tile field layout.
Pocket laser as runner
Carry a pocket cross to verify starter-row continuity while the main 4D unit stays planted at room center.
We earn a commission, at no additional cost to you.
8. CIGMAN 3×360 Green

CIGMAN’s 3×360 green laser delivers strong best floor laser level value when you need a 360° horizontal wrap for flooring installation without paying for a fourth vertical-heavy plane you may disable anyway. Twelve lines cover floor, walls, and ceiling intersections with remote selection.
- 3×360°; 12 visible lines
- Remote control
- 4000 mAh Type-C recharge
- IP54 jobsite
- Pulse extends range w/ receiver
- Full horizontal plane for floors
- Compact vs many 4D peers
- Remote toggles reduce walking
- Long battery for install days
- Strong construction ratings
- Not four-plane 4D
- Receiver optional for long pulse range
- Learning curve on line combos
For best laser level for flooring installation crews, the 4000 mAh pack and IP54 shell match dusty tile cuts and repeated room resets. Accuracy within ±4° self-leveling suits standard subfloor work—still verify diagonals before locking a large format pattern.
Pulse mode helps in brighter annex spaces if you add a compatible detector. Use manual lock only for intentional slopes. Clean the window after every dusty skim-coat day.
Choose CIGMAN when 3×360 coverage and remote control beat a bare cross-line. Step to DOVOH K4-360G when dual horizontal planes and bottom-tile marketing align with your workflow.
CIGMAN’s horizontal wrap is enough for many tile fields—add verticals only when wall stack lines dictate the floor pattern.
3×360 sweet spot
One full horizontal plane plus verticals often enough for floor tile without full 4D complexity.
3×360 floor plane focus
Enable the horizontal wrap first; add verticals only when squaring walls that dictate tile layout boundaries.
We earn a commission, at no additional cost to you.
9. DOVOH K4-360G 4D
DOVOH K4-360G is our Editor’s Choice best floor laser level because the four-plane design explicitly places a bottom horizontal line where tile installers need it—near the slab—while a top horizontal helps ceiling and cabinet alignment in the same setup.
- 4×360° green 4D planes
- Bottom laser for floor tile
- Dual 7.4V 2600 mAh batteries
- Magnetic bracket multi-mount
- Rubber overmold housing
- Bottom plane designed for floor tiling
- Top plane reaches near ceiling
- Dual batteries reduce downtime
- Shock-resistant overmold
- Square layout for large rooms
- Premium vs budget cross-lines
- Busy beam pattern in small baths
- Still indoor-first—not rotary grade
When shoppers search best laser level for flooring installation or best laser level for leveling floors, they often need square room layout plus a continuous floor reference without repositioning every four feet. K4-360G’s dual horizontal and dual vertical 360° lines visualize the entire field before the first tile touches thinset.
Use the magnetic bracket on steel door frames or the included clip paths; swap batteries at lunch instead of waiting on USB. Manual mode locks angles for non-level art walls—rare on floors, useful in full remodel passes. Verify ±4° self-level settles on slightly uneven subfloor mats.
Choose K4-360G for pro-leaning tile and floating floor layout. Choose Motovera or RockSeed when budget crosses matter more than full 4D coverage.
DOVOH’s bottom plane is why it leads tile crews; keep a spare charged pack labeled “afternoon” so brightness never becomes the reason lines fade.
Floor-tile design intent
The bottom 360° plane is the feature that separates flooring specialists from generic cross-lines.
Dual-battery tile days
Swap packs at lunch instead of dimming brightness to stretch a single cell across a large-format layout.
We earn a commission, at no additional cost to you.
10. RockSeed LV1 Red Cross
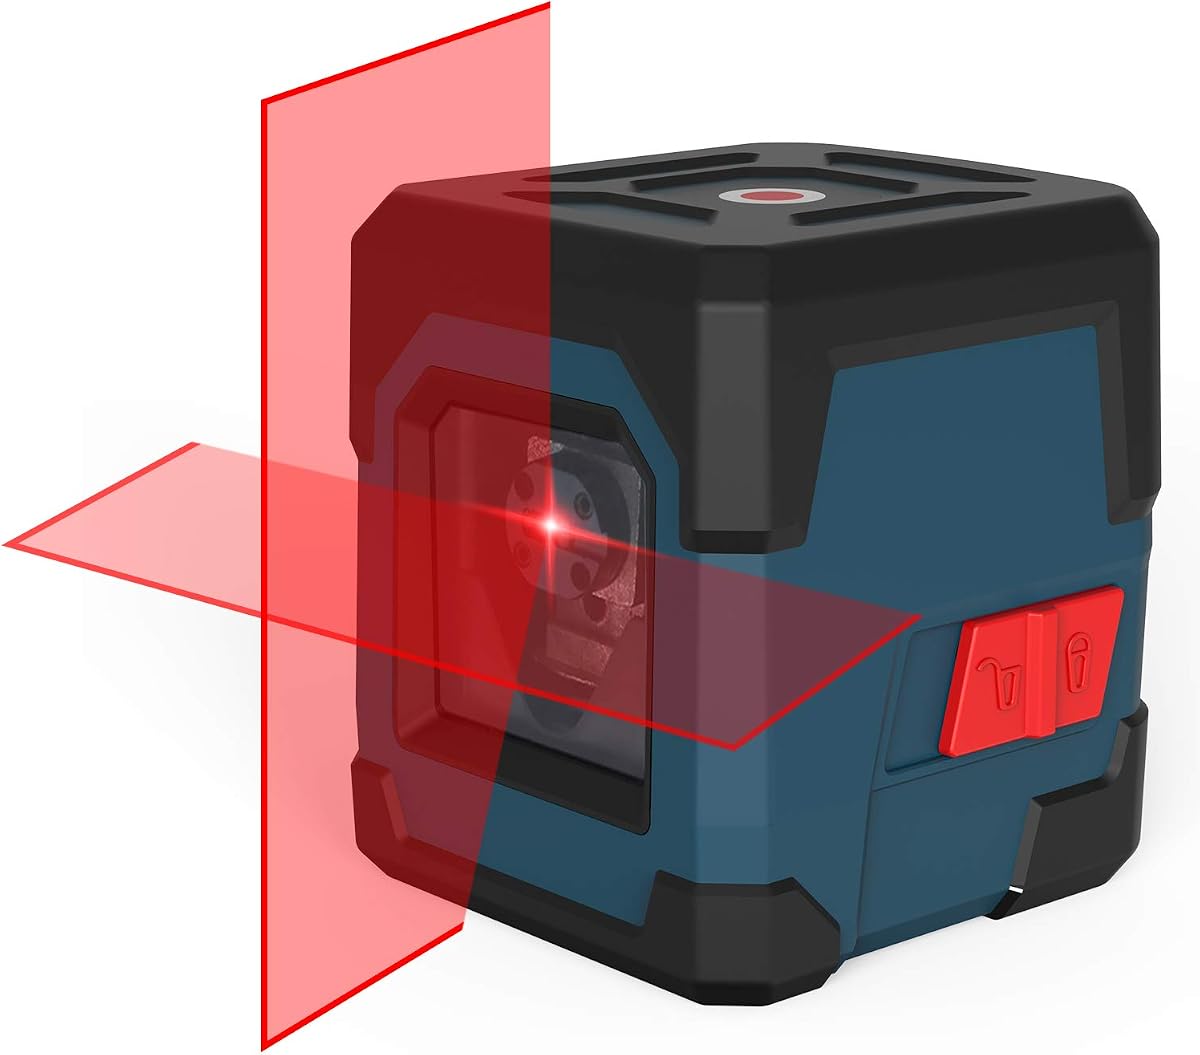
RockSeed LV1 is the honest budget best floor laser level when you are covering a small bedroom in LVP or verifying that a subfloor plane is reasonable before underlayment—not when you are tiling a 400-square-foot open kitchen alone.
- Red H/V cross-line
- ±1/8 in @ 30 ft
- 110° fan angle
- IP54 shock rating
- Magnetic pivot mount
- Lowest cost floor layout entry
- Simple cross for starter rows
- Manual + self-level modes
- Compact and stable footprint
- Adequate for small room vinyl/LVP
- Red harder to see on light floors
- No 360° plane
- No tripod included
As a best laser level for flooring installation starter, the red cross projects wide enough for short runs at ±1/8 inch over 30 feet. IP54 protection and magnetic mounting beat chalk lines for repeatability, though pale wood and sunlit rooms push you toward green competitors.
Toggle self-leveling for normal rooms; manual mode disables compensation for angled work only. Mount on a mini tripod if the magnetic foot cannot sit on your subfloor material. Check batteries before the first row—red diodes drain slower but dim beams lie.
Upgrade when room size or tile format demands 360° floor planes. Keep RockSeed when cost wins and the install fits in one afternoon.
RockSeed finishes small closets; if the next room is a sunlit kitchen, schedule a green 360° tool instead of forcing red across pale oak.
Small room reality
Red cross-lines work for modest floor projects; large tile fields want green 360° planes.
Small-room red honesty
A cheap red cross can finish a closet; it will not supervise a sunlit great-room tile field without constant repositioning and squinting.
We earn a commission, at no additional cost to you.
Buying Guide — Choosing the Best Laser Level for Flooring
The best laser level for leveling floors matches beam coverage to room size and material. Use these factors before buying a cross-line when you needed a floor plane—or a rotary when you needed a room tool.
Cross-line vs 360° floor plane vs 4D
A basic cross-line works for short runs and small rooms. A 360° horizontal plane lets you walk the perimeter without repositioning. 4D tools add a bottom laser near the tile surface and often a top line for full-room visualization.
Large format tile and open concepts favor 3×360 or 4×360 coverage. Closet LVP might only need Motovera or RockSeed.
If you install quarterly, a 3×360 often hits the budget sweet spot between Motovera simplicity and full 4D complexity.
Bottom laser height and parallax
DEGLASERS and DOVOH emphasize low offset from slab and wall. Parallax error grows when the beam sits too high above the finished floor height you are marking. Check where the diode exits relative to your tile thickness plan.
Measure the beam height above slab with a tape once and write it on painter’s tape on the tool so helpers stop guessing.
Green vs red on floor materials
Green reads better on pale tile, OSB, and bright rooms. Red remains usable indoors on darker subfloors and for budget one-room installs. Neither replaces square checks on diagonals.
Test both colors on a scrap of your actual flooring in the real room light before committing the purchase.
Tripod, square tools, and accessories
Motovera, DEGLASERS, and CinusLinus include tripods. The right-angle square laser complements—not replaces—a level plane for 90° corners. Confirm batteries, remotes, and brackets in the box photo versus title.
Soft bags collect grit that scratches windows—dump dust after every flooring day.
Accuracy claims vs flooring tolerance
±1/9 to ±1/8 inch at 30–33 feet suits most floor covering. Loose subfloor plane matters more than diode marketing for LVP. Always verify room square with diagonal measurements before locking the first row.
Manufacturer laser tolerance is not the same as TCNA tile flatness tolerances; read both.
What floor lasers cannot do
These are layout tools, not self-leveling compound guides for uneven slabs. They do not measure moisture, flatness, or structural plane. For site grading outdoors, buy a rotary with a receiver instead.
For outdoor patio elevation, switch categories to a rotary or outdoor receiver kit instead of forcing a floor 4D outside.
How to Use a Laser Level for Floor Installation
Establish room square first with diagonals or a right-angle laser at corners. Set your main laser on a stable tripod on the subfloor, unlock self-leveling, and project the horizontal reference at the intended finished floor height minus your material thickness if marking directly on slab.
Mark starter row lines lightly, dry-fit several planks or tiles, and check lippage before adhesive. On 4D tools, enable only the floor plane and one vertical for square. Reposition only when the plane cannot reach the next run—360° tools reduce that chore.
Clean optics after dusty cuts, lock pendulum for transport, and recheck level if the tripod gets kicked. Combine with manual flatness checks; lasers show plane, not subfloor humps.
On floating floors, mark the laser reference on the wall as a reveal line as well as on the slab so you can recover the plane after underlayment covers pencil ticks.
Frequently Asked Questions
What is the best floor laser level for tile?
DOVOH K4-360G is our Editor’s Choice for its bottom horizontal plane designed for floor tile. CinusLinus 4×360 and the 16-line 4D unit are strong alternatives when you want full-room planes and remotes. Also dry-fit two full rows before adhesive so the laser line and the plank edges agree at doorways.
Is a cross-line enough for flooring installation?
Often yes in small rooms. Open layouts and large tile benefit from 360° horizontal coverage. You will reposition a single cross more often than a 3×360 or 4D laser. If the subfloor humps, fix flatness first—lasers do not grind high spots.
Best laser level for leveling floors—does it level the slab?
No. It projects a level reference plane so you install floor covering square and consistent. Flattening an uneven slab requires grinding, patching, or self-leveler—not a line laser alone. Relative laser planes still need a moisture and flatness plan from the flooring manufacturer.
Why include a right-angle square laser?
Floor work needs 90° corners as much as level lines. The square tool speeds corner setup; pair it with a horizontal plane laser for long runs. Use the square tool at every inside corner that will host large-format tile.
Do I need pulse mode for floor work?
Usually no indoors. Pulse helps bright sunrooms if you add a compatible receiver. Most tile and LVP installs rely on constant lines. Save pulse for sunrooms; most slab work stays in constant mode.
Motovera vs DOVOH for flooring?
Motovera is a budget cross with tripod. DOVOH K4-360G adds four-plane coverage and a bottom laser for serious tile layout. Choose by room size and how often you want to reposition. If you already own a sturdy tripod, Motovera’s value rises further versus buying mounts separately.
Red or green for light oak LVP?
Green is easier on pale floors and bright spaces. Red RockSeed or Bosch can work in smaller, dimmer rooms or when you already own red-compatible habits. When in doubt on pale floors, rent or borrow a green unit for the layout day.
Which best floor laser level wins overall?
DOVOH K4-360G for pro-leaning tile layout, CinusLinus 4×360 for full-room coverage value, and Motovera for the best budget cross-line kit with tripod. Revisit the comparison table if your room count grows mid-remodel.
Final Thoughts on the Best Floor Laser Level
Floor layout rewards tools that keep a level plane near the slab: DOVOH K4-360G leads for tile specialists, CinusLinus wraps whole rooms, and Motovera covers budget installs. Add the right-angle square for corners; skip rotary marketing when the job stays indoors on subfloor.
Verify square manually, match beam color to your room lighting, and replace YOURTAG-20 before publishing links. The best laser level for flooring installation saves rework on starter rows—because the first line dictates every plank or tile after it.
Use the Top 3 as a shortlist, then read full reviews for plane coverage honest enough for your square footage.
If your next project jumps from a closet to an open kitchen, revisit whether a cross-line still matches the square footage before the thinset clock starts.
